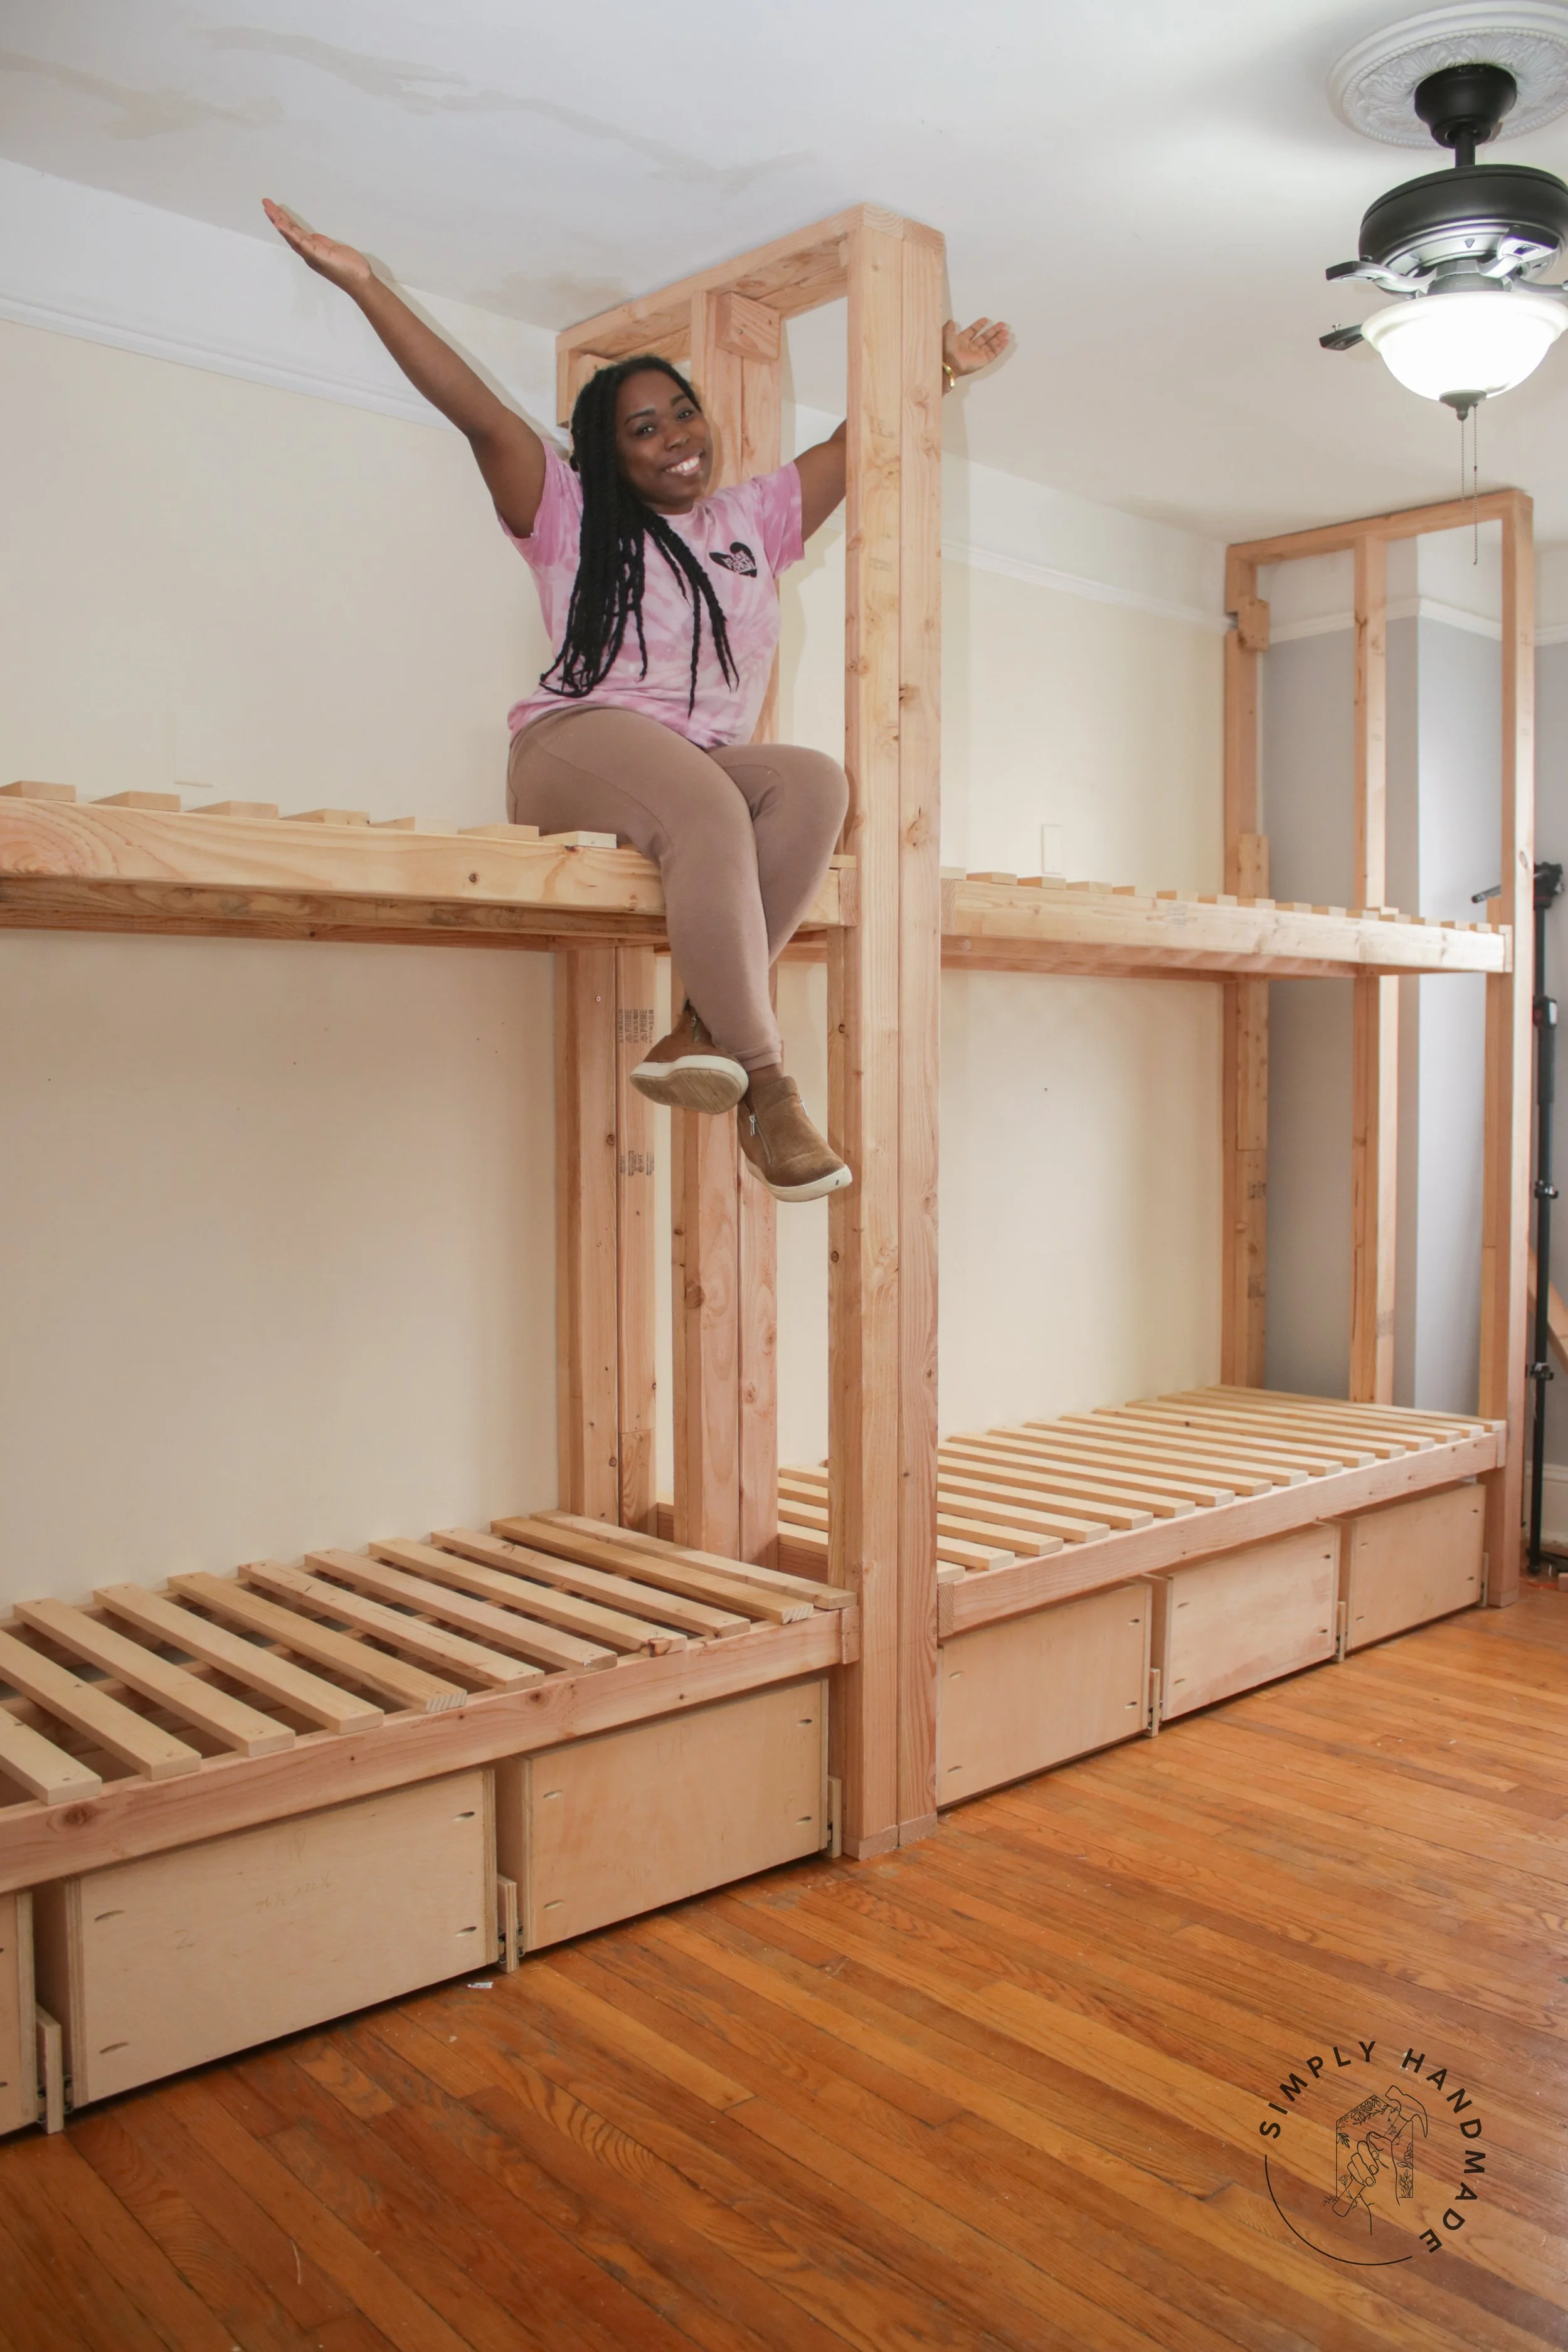
Renter-Friendly “Built-In” Bunk Beds (Part 1)
Living in a 2 bedroom rental with 4 kids can be a bit tight. We live in NYC, and space is a bit limited. As a long term renter, I love maximizing space and I think this is by far my biggest (and most proud) project. I can see this project being beneficial for those who have AirBnB’s, for foster parents, and other parents/caregivers like us who just need to maximize living in a small space.
When we first moved to this apartment, we only had our boys. I thought I was done having kids and it was absolutely perfect for us.. but then we had my daughter, and was surprised again with my son (seriously, I’m done having kids haha). With that, the once perfect space has become very, very tight! We gave up our bigger bedroom and gave it to the kids. We didn’t do much after that, honestly. The kids loved sharing the big bed, and there was also a crib for the youngest one (who just went in the bed with the rest of the kids! lol). As they’re getting older, I decided it was time for them to have their own beds. Of course since I’m a DIYer, I wanted to build their bunk beds.. but of course not any bunk beds, I had to make renter friendly built in bunk beds! Let’s get into the build.
Materials Needed:
2x4 framing lumber
1x3 boards
3-inch screws
1/2 inch plywood
Furniture extension cord
String and Magnet
Tools Needed:
Impact Driver
Star drill bit
Level
Speed Square or Carpenter square
Pencil
Jigsaw (optional)
Circular Saw
Table Saw
I decided to create different small areas in the bedroom. It’s quite a large room (approx 16’x13’), so there will be a place to sleep, place to play, a place to be creative, and a place to learn. The first part we’ll be focusing on is the place to sleep - it’s the biggest and most intricate part of the process, so I want to knock that out of the way. I created a mood board for their sleep area that will feature a fun wallpaper, bunk beds side by side, a custom ladder and rails, and drawers to replace all of the furniture we took away when we emptied the room. The bunks will be separated by a wall that’s not currently shown in the mood board above. Let’s face it- if the kids can simply climb across to each others bunk, they for sure won’t go to sleep when it’s bedtime.
If you want exact dimensions I used, please consider purchasing the plans for this bunk bed build. You can of course follow along and opt to measure your space and create your own cut list. Please note: the plans are for narrow twin mattresses, not regular twin mattress.
Step 1: Cutting and prepping the wood
Cut all your wood down to size. I suggest organizing them according to size so it’s easier to assemble the frames. For this build, there will be 4 vertical frames for support and 4 horizontal frames to hold the mattresses.
Step 2: Building the frame
I built and assembled one (1) frame before making the rest. I knew the walls in my apartment were not the best, and I was right. I had to shave off 1/4 inch from the final measurement and it fit perfectly. Once I got the measurement down, I made 3 more vertical frames. I opted to add a second 2x4 on the inside of all the frames in order to connect the horizontal pieces to the vertical pieces easily (see below)
Make sure corners of the frames are square during assembly!
I then built the frame where the mattress will fit in. I opted to get a narrow twin mattress to save some space. It’s 8 inches narrower than a traditional twin mattress. It’s still comfortable for me to lay on, so I knew it would be perfect for my kids, too!
For the bottom bunk, I knew I wanted to have drawers to replace the furniture we put into storage, so I opted to have it roughly 13-inches from the bottom of the frame. That left it high enough for drawers, and low enough for the kids to climb in. The second 2x4 came in handy here because the center supports on both vertical and horizontal pieces were at the same place, I could screw into the vertical slats knowing I won’t hit another screw.
The top bunk was roughly 58-inches from the bottom of the frame. This allowed for approximately 41-inch clearance for the top and bottom bunks. It’s enough space for me to sit on the mattresses on the top and bottom bunks without hitting my head. It doesn’t say much for adults (I’m 5’0”) but it will work out great for kids!
Once I was done, I found the studs behind the wall and connected the base of the bunk beds to the studs. (horizontal pieces were mattresses will lay on top of). I didn’t see the need to connect the vertical frame pieces to the wall since the bunks were being held up great.
If you’re making 4 bunks like I am, create a second frame the same way you just read for the first frame and connect the two vertical frames with some scrap 2x4’s.
The only points I connected to the studs were the horizontal bed rests. None of the vertical slats needed to be connected since it was already so sturdy!
Next up: I’ll be making drawers for the bottom of the bunks!
PIN THIS POST FOR LATER


